
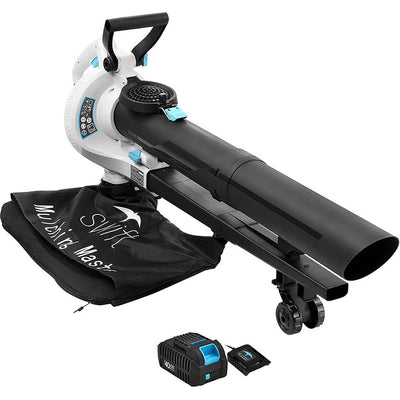


How To Assemble Redback Pro 120V Cordless Leaf Blower
The Redback Flex 120V Cordless Leaf Blower is a powerful tool designed to blow away leaves and debris in your yard quickly. It has great features that make it stand out from the crowd and also easy to assemble.

This guide is here to help you assemble your Redback Flex 120V Cordless Leaf Blower and get it ready for use.
Install and Remove the Blower Pipe
The blower pipe is the main part of the leaf blower, and its installation is essential for proper operation. Fortunately, you don't need special tools for this installation process.
- To remove the pipe for storage, rotate it counter-clockwise and pull it out.
- Attach the blowpipe into the connecting piece by inserting it until it clicks.
- Secure by turning it in a clockwise direction until firmly locked in place.
Assemble and Adjust the Shoulder Belt
The shoulder belt is essential for a comfortable and secure hold when using the leaf blower.
- Open the retaining hook and hook onto the fastening eye on the housing.
- Depress tabs on either side of the retaining clasp to adjust the shoulder belt to your height, then slide the retaining clasp up or down and release the tabs.
- Ensure the shoulder belt is securely attached and can move freely on its track.
- Adjust the strap length by sliding the clasp up or down the webbing, and secure it when satisfied.
Insert Battery
For optimal performance and safety for you and your tool, use a Redback Flex 120V Lithium-ion Battery.
- Charge your battery as described in the charger operation manual.
- Press the charged battery into the leaf blower tool until it clicks into place.
To remove the battery, press the release button and pull out the battery.
For more detailed instructions on assembling the cordless leaf blower, refer to the User Manual in your package or download it here.